
What is an EDI
EDI – Electronic Data Interchange is an electronic communication medium that is use to exchange documents between different trading partners. EDI have specific text file format followed with specific version and document Id. For example, the Warehouse shipping order document is termed as 940 EDI document.
Why do company prefer EDI to exchange documents?
There are many benefits. Computer to computer exchange is much less expensive, cost is a primary reason, as it’s a standard every business understands and parse the documents easily.
Role of BizTalk Server
BizTalk server is a powerful server side product developed by Microsoft that is used for integrating distributed systems or applications. It acts as a middle hub where the businesses can submit documents and the destination client can get it in his specific format. It works on the publisher/subscriber model in which the client can subscribe to the incoming messages and the publisher publishes it to that port. On the other hand if you need to tweak some attributes of the document or to transform the inputted document into the client’s specific format can be done using mapping or pipeline.
Scenario
In this article I will give the complete step by step in sending 940 EDI document and converting it to the client’s specific XML format, and placing it to the destination folder.
- Open Visual Studio 2012. (With BizTalk 2013 you can create BizTalk projects using VS 2012)
-
Create a new empty BizTalk project
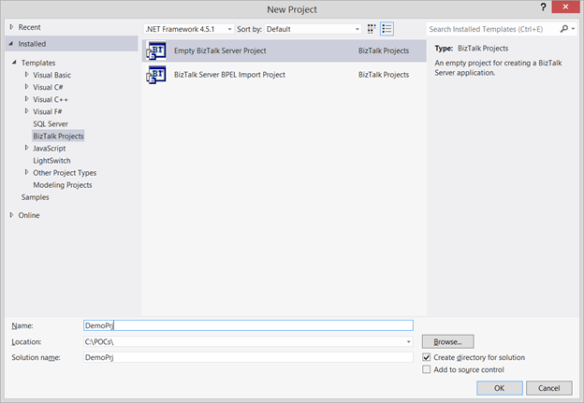
- Specify name and click OK.
- As we have to process EDI 940 document we need to add its schema
-
Right click the project and add existing schema from C:\Program Files (x86)\Microsoft BizTalk Server 2013\XSD_Schema\EDI

-
Now create another schema which you wanted to send to the destination client.

-
Now add some child elements into the schema as shown below

-
Now add a map to provide mapping between the 940 schema file to our custom created schema file.

-
Once this is added, we can see screen like this

-
Now click on the Open Source schema and select 940 schema document

-
Now click on the Open destination schema and select client specific one we recently created

-
For demo only, I am mapping ST01 with OrderNo and ST02 with CompanyCode

- Save the project and build it.
-
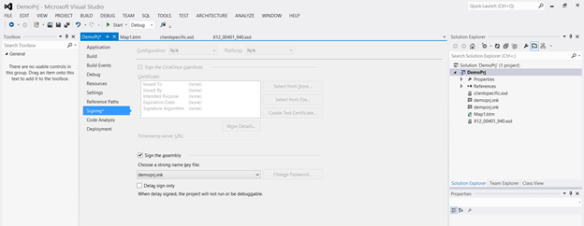
Before deploying sign the assembly from project properties signing tab
-
Go to the deployment tab and select Restart host Instances to True and specify the Application Name
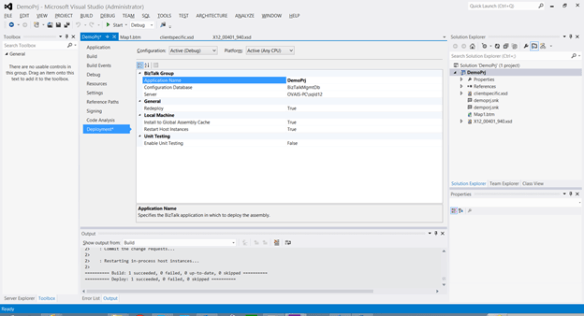
- Rebuild and deploy the solution, you will see the application added under the Applications
- Go to the BizTalk administrative console and you can see the application added in the Applications tab
-
Now create a receive port where you will submit the EDI 940 text file.
Right click the Receive Ports and click add New -> One way receive port

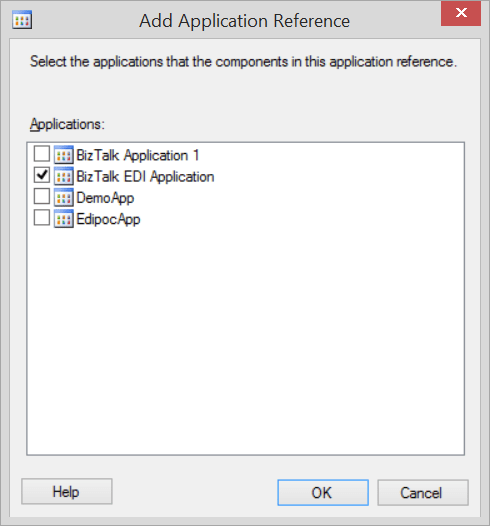
- In order to process EDI document we have add a reference to BizTalk EDI Application
- Right click the application and click properties
- Go to the references tab
-
Add application reference as BizTalk EDI Application
- Click on the Receive Locations and add new receive location by hitting the New button
- Specify Receive location name as RecieveLocation
- Select Type as File as we will be putting the EDI txt file on particular folder
- Click configure to select the path and other attributes
- Specify the receive folder and select file mask as *.txt
-
I have specified C:\demo\in as folder path where I will put EDI txt files


-
Now add a send port where the file after processing by BizTalk will be send.

- In the SendPort window select TYPE as file and configure the path where the document will be placed after processing from BizTalk. I have selected file extension as .xml as I will be sending the custom formatter xml on the folder.
- Select send pipeline as XMLTransmit
-
Add Outbound Maps and select the map you have created above.

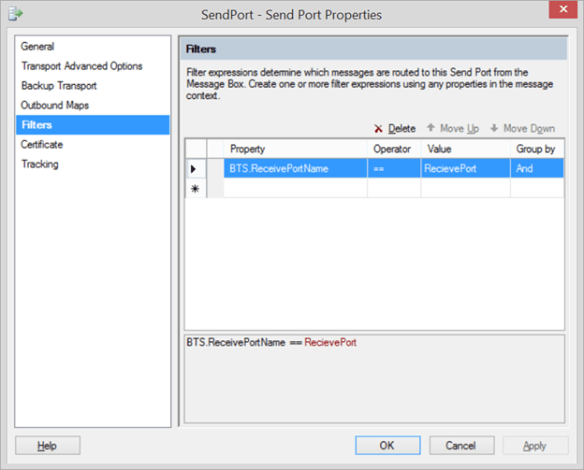
- Specify Filter to process only those messages that have specific attributes.
-
Here I will select BTS.RecievePortName = “RecievePort”
-
Click Ok
Running Solution
Now when you place the EDI text file at C:\Demo\In folder it will be picked, transformed into client specific xml format and placed it into the C:\Demo\out folder by BizTalk Server.
Output file format looks like below
<?xml version=”1.0″ encoding=”utf-8″?><ns0:DemoData xmlns:ns0=”http://DemoPrj.clientspecific”><OrderNo>94A</OrderNo><CompanyCode>0001</CompanyCode></ns0:DemoData>
Hope this helps to those who are new to BizTalk and EDI implementations.

Thank you for the detailed explanation..very well done !..thanks
Hello,
Firstly thanks for Sharing your explanation.
also i have one question, In receive location Screen you selected EDIPipeline as Receive pipeline, Where did you implemented. And let me know,. that process.
You have to add the reference to BizTalk EDI application https://msdn.microsoft.com/en-us/library/bb226366.aspx
Hi Ovais.. Thanks for the awesome tutorial..just one thing I want to know how the EDI text file should look like. If you kindly give an example of the EDI file it will be really helpful
Hi Ovais. Thank you for this tutorail. I have a problem with the Configuration of the Send Port. In the Tab “Outbound Maps” are no configuration opportunities. The Combo´s for “Source Document”, “Map” and “Target Document” are empty. Any idea what´s the reason for this
Make sure the document references are added properly
Thanks for this artical can you please provide any simple file of EDI so i will process and verify my issue in EDI file