Microsoft Technology Practices User Group

I have created a Meetup group named “Microsoft Technology Practices User Group” that focuses on latest tools and technologies on Microsoft Platform. The vision of this group is to help the developer community to share, explore, learn and develop things on upcoming and latest Microsoft technology stack.

This group is only 2 weeks old, and I believe the more we grow we will get more sponsors which will intimately provide more perks and benefits to the members of this group in terms of links to different training materials and sample projects and subscriptions to paid content. This is completely based on volunteer ship and everyone has to work together to expand and grow. Active members will get opportunities to give presentations, trainings and demo sessions to the developer community time to time which will certainly help them to polish their other i.e. communication, presentation skills as well.

Anyone can join this group but should be passionate of sharing and learning things on Microsoft technologies.

If you want to be a member, please visit the site http://meetup.com/MSTPUG and join!

Hope to see you in the upcoming events.

Handling User Control Events in ASP.Net

Although most of the developers know how to handle events of User Controls, but this will help for those developers who never came across with this before and wants to learn with a simple example that details about handling custom user control events on aspx pages.

What are User Controls?

User controls are just like standard ASP.Net webform with few limitations. It contains a designer view where the user can drag and drop existing controls of ASP.net or third party to structure that user control. In order to learn more about User control you can follow this link http://msdn.microsoft.com/en-us/library/y6wb1a0e(v=vs.100).aspx

Handling custom developed User Control Event

Let suppose we have a user control containing a textbox and a button. And we have an aspx page where we are using that control. Now inorder to handle the button click event of the User control’s button click event on aspx page we will go through the following steps.

Following is a code snippet of User Control named “ctrlCustomUserControl.ascx”

<%@
Control
Language=”C#” AutoEventWireup=”true” CodeBehind=”ctrlMyUserControl.ascx.cs” Inherits=”WebApplication7.ctrlMyUserControl”
%>

<asp:TextBox
ID=”txtBox” runat=”server”></asp:TextBox>

<asp:Button
ID=”btnClickMe” runat=”server” Text=”Click Me!”


onclick=”btnClickMe_Click”
/>

You can see there are two controls placed, one is textbox and the other is button.

Code behind file looks like as follows


public
partial
class
ctrlMyUserControl : System.Web.UI.UserControl

{


public
delegate
void
ClickHandler(object sender, EventArgs e);


public
event
ClickHandler Click;


protected
void btnClickMe_Click(object sender, EventArgs e)

{

Click(sender, e);

}


public
String Text

{


set { this.txtBox.Text = value; }

}

}

 Above code shows that there is a delegate named ClickHandler and I have declare its event named Click. And I have also registered the button click event and called my custom Click event there, which will be registered by the ASPX page will be invoked from this event.

Now, lets look into the “Default.aspx” page where I am using this control.

<%@
Page
Title=”Home Page” Language=”C#” AutoEventWireup=”true”


CodeBehind=”Default.aspx.cs” Inherits=”WebApplication7._Default”
%>

<%@
Register
Src=”~/ctrlMyUserControl.ascx” TagName=”MyControl” TagPrefix=”uc”%>

<form
runat=”server”>


<uc:MyControl
id=”myctrl” runat=”server” OnClick=”myctrl_click”></uc:MyControl>

</form>

Second statement shows the registration of my custom user control on aspx page, tagprefix and tagname values are used to define control tag.

I have used uc as the tagprefix and MyControl as tagname. You can see how I have specified the markup of custom user control. One important thing, you can see that I have specified OnClick event. Actually if you recall the control code behind file there I have an event named “Click” and inorder to register it on any aspx page we have to add a prefix “On” i.e. “OnClick”. This is how we can register custom events of user the control on aspx page.

Code behind of Default.aspx is as follows


public
partial
class
_Default : System.Web.UI.Page

{


protected
void myctrl_click(object sender, EventArgs e)

{

myctrl.Text = “Hello World!”;

}

}

When user click on the button, it will populate “Hello World!” text on the text box.


Happy Coding!


Logging Messages from Windows Service to Windows Form using WCF Duplex Messaging

As you all know windows services run in background and user can start or configure them through Services panel in Windows Operating System. In order to do the logging to check what the service is doing you can log messages in database, message queues, event logs etc. But in order to send back and forth messages to any windows application to show real time task execution is only possible via TCP socket connection, remoting etc.

In this post I will show you the way of logging messages from Windows Services to Windows form based Monitor application using WCF Duplex Messaging.

Step 1: Creating WCF Service Library

  1. Create a WCF Service Library project from Visual Studio
  2. Add a Service Contract interface named as “IMonitorService”

[ServiceContract(

Name = “IMonitorService”,

SessionMode = SessionMode.Required,

CallbackContract = typeof(IMonitorServiceCallback))]


public
interface
IMonitorService

{

[OperationContract]


void Login();

[OperationContract]


void Logout();

[OperationContract]


void LogMessages(String message);

}

    In the above code, I have created an interface and provided three methods signature Login, Logout and LogMessages. Login and Logout will be used to connect or disconnect to the Service and LogMessages is used to log messages to client. You will notice that in the ServiceContract attribute I have specified CallbackContract which actually holds the type information of the Call back contract interface through which when the client invoke any of the login, logout or logmessages server can get the callbackcontract object and sends the response back to client itself.

  1. Here is the code for IMonitorServiceCallback contract interface.


public
interface
IMonitorServiceCallback

{

[OperationContract]


void NotifyClient(String message);

}

    In the above code there is a callback contract interface which holds one method signature “NotifyClient” which takes string as a parameter. Server can call NotifyClient method and send messages to the connected clients.

  1. Now create another class MonitorService and implement IMonitorService interface. Following code shows the complete

    code shows the complete implementation.

[ServiceBehavior(

ConcurrencyMode = ConcurrencyMode.Reentrant,

InstanceContextMode = InstanceContextMode.PerCall)]


public
class
MonitorService : IMonitorService

{


public
static
List<IMonitorServiceCallback> callBackList = new
List<IMonitorServiceCallback>();


public MonitorService()

{

}


public
void Login()

{


IMonitorServiceCallback callback = OperationContext.Current.GetCallbackChannel<IMonitorServiceCallback>();


if (!callBackList.Contains(callback))

{

callBackList.Add(callback);

}

}


public
void Logout()

{


IMonitorServiceCallback callback = OperationContext.Current.GetCallbackChannel<IMonitorServiceCallback>();


if (callBackList.Contains(callback))

{

callBackList.Remove(callback);

}

callback.NotifyClient(“You are Logged out”);

}


public
void LogMessages(string message)

{


foreach (IMonitorServiceCallback callback in callBackList)

{

callback.NotifyClient(message);

}

}

The above code shows the implementation of the IMonitorService interface.

Step 2: Create Windows Service project and use WCF Service Library

  1. Create a new “Windows Service” project using Visual Studio.
  2. In the Start method write some code to let service app do some work.
  3. Add project reference of the WCF Service Application
  4. Initialize the ServiceHost object of WCF framework

    ServiceHost host = new
    ServiceHost(typeof(MonitorService));

host.Open();

  1. Implement the LogMessage method and notify callback contracts.


foreach (IMonitorServiceCallback callback in
MonitorService.callBackList)

{

callback.NotifyClient(message);

}

  1. App.config for Windows Service

<?xml
version=1.0
encoding=utf-8 ?>

<configuration>

<system.web>

<compilation
debug=true />

</system.web>

<system.serviceModel>

<bindings>

<netTcpBinding>

<binding
name=DefaultNetTCPBinding
receiveTimeout=Infinite>

<reliableSession
inactivityTimeout=Infinite />

</binding>

</netTcpBinding>

</bindings>

<services>

<service
name=MonitorService>

<host>

<baseAddresses>

<add
baseAddress=net.tcp://localhost:9909/MonitorService/ />

</baseAddresses>

</host>

<!– Service Endpoints –>

<!– Unless fully qualified, address is relative to base address supplied above –>

<endpoint


address=service


binding=netTcpBinding
bindingConfiguration=DefaultNetTCPBinding


contract=IMonitorService


name=TcpBinding />

</service>

</services>

<behaviors>

<serviceBehaviors>

<behavior>

<!– To avoid disclosing metadata information,

set the value below to false and remove the metadata endpoint above before deployment –>

<serviceMetadata
httpGetEnabled=False/>

<!– To receive exception details in faults for debugging purposes,

set the value below to true. Set to false before deployment

to avoid disclosing exception information –>

<serviceDebug
includeExceptionDetailInFaults=False />

</behavior>

</serviceBehaviors>

</behaviors>

</system.serviceModel>

</configuration>

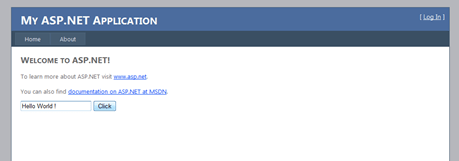
Step 3: Developing Monitor Application

  1. Create a new Windows Application project using Visual Studio.
  2. Add RichTextBox control to log messages
  3. Add two buttons connect and disconnect.
  4. Now Add the WCF Service reference
  5. Implement Login, Logout and NotifyClient messages
  6. Add following code in the Login method
  7. Implement IMonitorServiceCallback interface and write below code.


try

{

client = new
MonitorServiceClient(new
InstanceContext(this), “TcpBinding”);

client.Open();

client.Login();

WriteTextMessage(“Monitor successfully connected to the Windows Service for logging messages”);

}


catch (Exception ex)

{

WriteTextMessage(“Couldn’t connect to the Service, cause “ + ex.Message);

}

  1. Add following code in the Logout nethod

client.Close();

  1. Add following code in the NotifyClient method.

public
void LogMessage(string message)

{


if (this.InvokeRequired == false)

{


this.BeginInvoke(new
WriteMessage(WriteTextMessage),message);

}


else

{


this.Invoke(new
WriteMessage(WriteTextMessage), message);

}

}

  1. As the application thread is different so we need to invoke the WriteTextMessage using BeginInvoke. In that case I have declared a delegate with the same method signature as of WriteTextMessage and set messages in the RichTextBox control.

public
delegate
void
WriteMessage(String str);


public
void WriteTextMessage(String str)

{

rchTextBox.Text += str + “\n”;

rchTextBox.ScrollToCaret();

}

  1. App.config for Monitor App

<?xml
version=1.0
encoding=utf-8 ?>

<configuration>

<appSettings>

<add
key=DatabaseServer
value=.\sqlexpress/>

</appSettings>

<system.serviceModel>

<bindings>

<netTcpBinding>

<binding
name=TcpBinding
closeTimeout=00:01:00
openTimeout=00:01:00


receiveTimeout=00:10:00
sendTimeout=00:01:00
transactionFlow=false


transferMode=Buffered
transactionProtocol=OleTransactions


hostNameComparisonMode=StrongWildcard
listenBacklog=10
maxBufferPoolSize=524288


maxBufferSize=65536
maxConnections=10
maxReceivedMessageSize=65536>

<readerQuotas
maxDepth=32
maxStringContentLength=8192
maxArrayLength=16384


maxBytesPerRead=4096
maxNameTableCharCount=16384 />

<reliableSession
ordered=true
inactivityTimeout=00:10:00


enabled=false />

<security
mode=Transport>

<transport
clientCredentialType=Windows
protectionLevel=EncryptAndSign />

<message
clientCredentialType=Windows />

</security>

</binding>

</netTcpBinding>

<wsDualHttpBinding>

<binding
name=WSDualHttpBinding_IMonitorService
closeTimeout=00:01:00


openTimeout=00:01:00
receiveTimeout=00:10:00
sendTimeout=00:01:00


bypassProxyOnLocal=false
transactionFlow=false
hostNameComparisonMode=StrongWildcard


maxBufferPoolSize=524288
maxReceivedMessageSize=65536
messageEncoding=Text


textEncoding=utf-8
useDefaultWebProxy=true>

<readerQuotas
maxDepth=32
maxStringContentLength=8192
maxArrayLength=16384


maxBytesPerRead=4096
maxNameTableCharCount=16384 />

<reliableSession
ordered=true
inactivityTimeout=00:10:00 />

<security
mode=Message>

<message
clientCredentialType=Windows
negotiateServiceCredential=true


algorithmSuite=Default />

</security>

</binding>

</wsDualHttpBinding>

</bindings>

<client>

<endpoint
address=net.tcp://localhost:9909/MonitorService/service


binding=netTcpBinding
bindingConfiguration=TcpBinding
contract=IMonitorService


name=TcpBinding>

<identity>

<userPrincipalName
value=ovais />

</identity>

</endpoint>

<endpoint
address=http://localhost:8732/Design_Time_Addresses/MonitorService/


binding=wsDualHttpBinding
bindingConfiguration=WSDualHttpBinding_IMonitorService


contract=IMonitorService
name=WSDualHttpBinding_IMonitorService>

<identity>

<dns
value=localhost />

</identity>

</endpoint>

</client>

</system.serviceModel>

</configuration>

Step 4: Running solution

  1. Install the service and start it
  2. Start the Monitor app and click on connect
  3. Once the service start it will send messages to client and real time logging is achieved.

Using Code First in Entity Framework

Introduction

Generally, entity framework is majorly used by adding an edmx file into your .Net solution and creating tables or dropping tables from existing SQL database. But in certain cases when we are working on large scale applications and having layered architecture with different layers (presentation, service, business and data access) it becomes quite difficult for the developer to make it loosely coupled.

In order to explain, let’s take a simple scenario. Let suppose you have a Web Application with following layers

  1. Web Front End ( ASP.Net MVC)
  2. Service Layer (WCF, Web Services)
  3. Business Layer (Business Managers)
  4. Data Access Layer (Entity Framework)

Web Front End use some models that are bean classes to store data and transmit them the Service layer, service layers are expecting Data Contracts to be passed as parameters and Business Layers actually processes that data and passes it to Data Access Layer to perform to and fro CRUD operations.

Problem

We can make common library project that contains single bean which can be travel from presentation layer to Services and Services to Business layer. Problem arises when we need to pass it to the entity framework. As if we are not using a code first approach we need to map that class to appropriate entity framework entity class. This will increase performance decline and also increase extra effort for developer to provide mappings for all the entities.

Resolution

When you use Code First model you really don’t need to include edmx file into your solution, and you just have to define bean classes or entity classes for each table creating or created already. This helps to place all the classes in one common library that will be referenced by all and will support loosely coupling of layers.

Steps

Steps to Create Entity Framework Code First Model

  1. Create a new Project named as CommonEntities
  2. Add a Library Package Reference of EFCodeFirst using NuGet

  3. Create a new folder named as “Entities” inside your project and define all the entities. Entities contain setter getter properties for all the columns in a table.

For e.g. here are the sample classes


public
class
DocumentColumns

{

[Key]


public
Int32 ColumnId { get; set; }


public
String ColumnName { get; set; }


public
String ColumnType { get; set; }


public
Int32 TypeSize { get; set; }


public
Boolean IsPrimary { get; set; }


public
Boolean AllowNulls { get; set; }


public
Boolean IsMeasure { get; set; }


public
Int32 DocumentId { get; set; }


public
String ColumnSheets { get; set; }

}


public
class
Document

{

[Key]


public
Int32 DocumentId { get; set; }


public
String DocumentPath { get; set; }


public
String DocumentName { get; set; }


public
String DocumentDescription { get; set; }


public
String TableName { get; set; }


public
Boolean IsActive { get; set; }


public
Boolean IsStarSchema { get; set; }


public
String DatabaseName { get; set; }


public
ICollection<DocumentColumns> DocumentColumns { get; set; }

}

Attribute [Key] denotes that particular property is a primary key.

  1. Create a custom context class named as “MyDbContext” which should be derived from System.Data.Entity.DbContext

    public
    class
    SchedulerContext : System.Data.Entity.DbContext

    {


    public
    DbSet<Document> Documents { get; set; }


    public
    DbSet<DocumentColumns> DocumentColumns { get; set; }


    protected
    override
    void OnModelCreating(System.Data.Entity.ModelConfiguration.ModelBuilder modelBuilder)

    {

    modelBuilder.IncludeMetadataInDatabase = false;

    }

    }

Here in the above snippet I have overridden the OnModelCreating method and set IncludeMetadataInDatabase = false, this basically not create a new database. This is normally used when you have already an existing database created and you don’t want Entity Framework to create a new database for you.

  1. Add the App.config file in your project and specify the Connectionstring as follows

<connectionStrings>

<add
name=ExcelScheduler.Database.SchedulerContext


connectionString=Data Source=.\sqlexpress;Initial Catalog=SchedulerDB;Integrated Security=True


providerName=System.Data.SqlClient />

</connectionStrings>

This is all done!

Now in order the treat any entity class as WCF data contract you just need to annotate your entity class with [DataContract] attribute and properties with [DataMember] attribute. And same goes if you want to use it with Asp.Net MVC models.

Debugging javascript from Visual Studio

    1. Open the Tools > Internet Options and click on Advanced tab.
    2. Uncheck “Disable script debugging” in the settings list.

    3. Now for any function where you want to debug just specify debugger; like this.

      Example

$(document).ready(function () {


debugger;

     alert(“hello world!”);

}

  • That’s all! Now just run the application in debug mode from visual studio debug it.

Custom Plugin Framework in .Net

Sometimes we came in situation when we need to design an architecture which supports plugin of components at runtime. That facilitates developer to not to compile the main application again and again for new addition of components/plugins and just with a little configuration it should be activated in the application. Therefore, this post shows the plugin framework which helps to plug in components with little configuration.

I took the logger example to develop this framework. In which I will show you how to plug in multiple types of logger into the application. The application is very simple just to show an idea which logs the text from the textbox control on the button click event. System checks the plugins that are available and call the ExecuteTask method of each plugin attached with the application.

Let’s start some coding work.

Create Plugin Framework

  1. Create a new class library project in .net to develop a plugin framework.
  2. Create an interface named IPlugin.cs
  3. Define a property “Name” and method “ExecuteTask” which takes String message as a parameter.

    namespace PluginFramework

    {


    public
    interface
    IPlugin

    {


    String name { get; }


    void ExecuteTask(String message);

    }

    }

  4. Actually the concept behind this framework is that developer does not need to reference new plugins dll or class libary they will just add it in the application configuration file. We will provide an specific section for Plugins. Therefore, we need to create a class which implements IConfigurationSectionHandler and define CreateTask method.
  5. The code snippet for PluginSectionHandler as follows

namespace PluginFramework

{


public
class
PluginSectionHandler : IConfigurationSectionHandler

{


ArrayList plugins = new
ArrayList();


public
object Create(object parent, object configContext, System.Xml.XmlNode section)

{


foreach(XmlNode plugin in section.ChildNodes)

{


object plugObject= Activator.CreateInstance(Type.GetType(plugin.Attributes[“type”].Value));

 plugins.Add(plugObject);

}


return plugins;

}

}

}

Create Custom Plugins

  1. Create another class library project named as “MessagePlugin”. This library contains all types of logger which will be added as a plugin In the main application.
  2. I will create two classes one which write the message in the event log and the other write it in the trace window.
  3. Therefore, create a new TraceMessage class and implement the IPlugin interface.
  4. Define the body for ExecuteTask method as follows.

    public
    class
    TraceMessage : IPlugin

    {


    public
    string name

    {


    get { return
    “Trace Logger”; }

    }


    public
    void ExecuteTask(string message)

    {

    System.Diagnostics.Trace.WriteLine(message);

    }

    }

  5. For EventLogMessage plugin, create a new class and implement the IPlugin interface.
  6. Define the body for ExecuteTask method as follows.

    public
    class
    EventLogMessage : IPlugin

    {


    public
    string name

    {


    get

    {


    return
    “Event Logger”;

    }

    }


    public
    void ExecuteTask(String message)

    {


if (!System.Diagnostics.EventLog.SourceExists(“PluginFramework”))

{

System.Diagnostics.EventLog.CreateEventSource(“PluginFramework”, “MyLog”);

}

System.Diagnostics.EventLog log = new System.Diagnostics.EventLog();

log.Source = “PluginFramework”;

log.WriteEntry(message);

}

}

Create Main Application

  1. Create a Windows Application project and add two controls TextBox and a button on the form.

  2. The concept is that developer will not reference the MessagePlugin library created above in the windows application and he will just define the Type and assembly in the app.config file. When the application starts it will load all the sections added. To do this, we will add app.config file first.
  3. Open the app.config file and place a configsections tag and under configsections tag define a new section tag.

    <configSections>

    <section
    name=plugins
    type=PluginFramework.PluginSectionHandler, PluginFramework/>

    </configSections>

  4. Now add the plugins in the configuration file as below.

<plugins>

<plugin
type=MessagePlugin.EventLogMessage, MessagePlugin />

<plugin
type=MessagePlugin.TraceMessage, MessagePlugin />

</plugins>

Complete app.config will look like as follows.

<?xml
version=1.0
encoding=utf-8 ?>

<configuration>

<configSections>

<section
name=plugins
type=PluginFramework.PluginSectionHandler, PluginFramework/>

</configSections>

<plugins>

<plugin
type=MessagePlugin.EventLogMessage, MessagePlugin />

<plugin
type=MessagePlugin.TraceMessage, MessagePlugin />

</plugins>

</configuration>

  1. Override the onload event of form and load the plugins as follows.


    protected
    override
    void OnLoad(EventArgs e)

    {


    base.OnLoad(e);

     LoadPlugins();

    }


    private
    void LoadPlugins()

    {

     pluginList = (ArrayList)ConfigurationSettings.GetConfig(“plugins”);

    }

  2. Now in the button click event call the plugin’s execute task method.


    private
    void btnLog_Click(object sender, EventArgs e)

    {


    foreach (IPlugin plugin in pluginList)

    {

    plugin.ExecuteTask(textBox1.Text);

    }

    }

  3. Place the MessagePlugins dll or class library in the bin directory of windows application and run the application to test.

For the complete code please email me at ovaismehboob@yahoo.com.

Develop and Consume WCF REST Service

This article shows a simple way of developing WCF REST Services and consuming them through JQuery in ASP.Net application.

What is REST?

REST – Representational State Transfer in an architectural style for designing network applications. The main idea behind is that rather using different mechanisms such as SOAP, CORBA, RPC to connect between systems, user can use simple HTTP to make calls between them. RESTful Services use HTTP requests to POST (modify or update) data, to DEL (delete) data or GET(retrieve) data.

What is JQuery?

jQuery is a coding language that is a branch from JavaScript. jQuery works like JavaScript where it’s used to help with interaction and effects with your development code.

You can find the complete tutorial of JQuery at http://docs.jquery.com/Tutorials:How_jQuery_Works

Let’s start the real Coding work.

Creating WCF Rest Service

  1. Open Visual Studio
  2. Create a WCF Service Application Project.
  3. Create a new Service Interface named as IRestServiceImpl.cs, following code snippet shows the complete code of this interface.


    namespace RestService

    {


    // NOTE: You can use the “Rename” command on the “Refactor” menu to change the interface name “IRestServiceImpl” in both code and config file together.

    [ServiceContract]


    public
    interface
    IRestServiceImpl

    {

    [OperationContract]

    [WebGet(ResponseFormat=WebMessageFormat.Xml, BodyStyle=WebMessageBodyStyle.Wrapped, UriTemplate= “xml/{id}”)]


    string XMLData(string id);


    [OperationContract]

    [WebGet(ResponseFormat=WebMessageFormat.Json, BodyStyle=WebMessageBodyStyle.Wrapped, UriTemplate=“json/{id}”)]


    string JSONData(string id);

    }

    }


    In WCF all the web methods should be annotated with the OperationContract and the service class should be annotated with the ServiceContract. This is necessary for both SOAP based or REST based calls.

    Rest, as per the above code there are two WCF operation contracts; one returns data in XML and the other returns data in JSON. JSON data is more less in size as it does not contains tags and all that what xml have. Both the methods are annotated with WebGet attribute.
    In WCF for making REST based calls you need to annotate the method either using WebGet or WebInvoke to define specific mapping to the HTTP uniform interface. The reason Microsoft provided two attributes because GET requests are logically different from POST, DELETE, PUT etc. the bottom line is if you want to use HTTP GET you use WebGet otherwise WebInvoke for all others. Here as we are retrieving the data I have used WebGet.


    ResponseFormat tell what the format of the data that is travel back to client. There are two formats XML or JSON. UriTemplate helps to specify the template of REST calls over HTTP and the way method will be accessible from client in a REST way.


  4. Create a RestServiceImpl.cs class and implement IRestServiceImpl.cs interface. Following code shows the complete snippet of RestServiceImpl.cs


    namespace RestService

    {


    // NOTE: You can use the “Rename” command on the “Refactor” menu to change the class name “RestServiceImpl” in code, svc and config file together.


    public
    class
    RestServiceImpl : IRestServiceImpl

    {


    public
    string XMLData(string id)

    {


    return
    “you have typed=” + id;

    }


public
string JSONData(string id)

{


return
“you have typed=” + id;

}

}

}


Testing WCF Service

  1. Now just run the WCF Service Application and test. Below URL shows the way of making REST calls.

    For XML,

    http://localhost:31189/RestServiceImpl.svc/xml/123

    For JSON,

    http://localhost:31189/RestServiceImpl.svc/json/123

Creating ASP.Net Web Application


  1. Create ASP.Net web project to consume WCF REST service
  2. Open default.aspx page and add html text box and button


<input
id=”text” type=”text”/>

<input
id=”set” type=”button” value=”Click” onclick=”RetrieveVIAWCFREST();”/>


  1. Now define the function RetrieveVIAWCFREST under script tag


    <script>


    function RetrieveVIAWCFREST() {


    var textVal= $(‘#text’).val();


    $.ajax({

    type: “GET”,

    contentType: “application/json; charset=utf-8”,

    url: http://localhost:31189/RestServiceImpl.svc/json/&#8221;+textVal,

    dataType: “json”,

    processdata: false,

    success: function (data) {


    var result=data.JSONDataResult;

    alert(result);

    },

    error: function () { alert(“Not Done”); }

    });


    }


    </script>


.ajax is a JQuery function which helps the developer to transport the data from client server in a simple way. It calls XMLHttpRequest object inside and make calls automatically. But developer has to define certain attribute values to make call smoothly.

When the call executes successfully success function will be called and the appropriate action will be executed inside it. On error, error function will be called and the appropriate action will be executed. There is a complete attribute also and user can define a function on complete event. Please check JQuery docs for more information.


Running Web Application

Let’s run the Web application. Enter text in the textbox and click the ‘Click’ button.


LinkedIn Authentication in ASP.Net

For LinkedIn Authentication I have utilized LinkedIn Rest API which use oAuth 1.0 to authorize users and begin making REST API calls using any programming language. Complete understanding tutorials are placed at https://developer.linkedin.com/documents/oauth-overview

Following are the steps to implement LinkedIn Authentication in ASP.Net

Step 1 Installations

  1. Install Hammock Library from CodePlex.com, Hammock is a REST library for .Net that greatly simplifies consuming Restful services.
  2. Configure NuGet (optional to ease referencing code plex libraries directly in Visual Studio project). You can also get the NuGet from http://nuget.codeplex.com/

Step 2 Create LinkedIn Application in LinkedIn developer platform

  1. Go to https://www.linkedin.com/secure/developer
  2. Sign in with your LinkedIn credentials.
  3. Click on Add New Application and fill in the form.
  4. Once your application is created note the API Key and Secret Key that we will use to implement LinkedIn authentication in our application.

Step 3 Create ASP.Net Application

  1. Open Visual Studio and create a new Web Application project.
  2. Add references to Hammock library either by manually referencing from folder or just referencing through NuGet in Visual Studio Directly as shown below.

    Following are the Hammock assemblies we will utilize in the project.

  3. In the Default.aspx page add a button to login with LinkedIn and in that button’s click event call RequestTokenAndAuthorize method which is shown below.
  4. In the Default.aspx page create a new Method named RequestTokenAndAuthorize and place following code.

    public
    void RequestTokenAndAuthorize()

    {


    var credentials = new Hammock.Authentication.OAuth.OAuthCredentials

    {

     CallbackUrl = http://localhost/LinkedInAuthWebSite/Callback.aspx&#8221;,

     ConsumerKey = “API Key”,

     ConsumerSecret = “Secret Key”,

    Type = Hammock.Authentication.OAuth.OAuthType.RequestToken

    };


    var client = new Hammock.RestClient

    {

    Authority = https://api.linkedin.com/uas/oauth&#8221;, Credentials = credentials };


    var request = new Hammock.RestRequest { Path = “requestToken” };

    Hammock.RestResponse response = client.Request(request);


    String[] strResponseAttributes = response.Content.Split(‘&’);


    string token = strResponseAttributes[0].Substring(strResponseAttributes[0].LastIndexOf(‘=’) + 1);


    string authToken = strResponseAttributes[1].Substring(strResponseAttributes[1].LastIndexOf(‘=’) + 1);

    Session[“Token”] = token;

    Session[“TokenSecret”] = authToken;

    Response.Redirect(https://www.linkedin.com/uas/oauth/authorize?oauth_token=&#8221; + token);

}

CallBack URL will be called when the authorization is successfully done by LinkedIn.

  1. Now Create a CallBack page where the callback takes place when the authorization is done after successful login. In my case I have created a Callback.aspx.
  2. In the Callback page place following code in the Page_Load method.

protected
void Page_Load(object sender, EventArgs e)

{


String verifier = Request.QueryString[“oauth_verifier”].ToString();

Session[“Verifier”] = verifier;


var credentials = new Hammock.Authentication.OAuth.OAuthCredentials

{

 ConsumerKey = “API Key”,

 ConsumerSecret = “Secret Key”,

Token = Session[“Token”].ToString(),

 TokenSecret = Session[“TokenSecret”].ToString(),

Verifier = verifier,

Type = Hammock.Authentication.OAuth.OAuthType.AccessToken,

 ParameterHandling = Hammock.Authentication.OAuth.OAuthParameterHandling.HttpAuthorizationHeader,

 SignatureMethod = Hammock.Authentication.OAuth.OAuthSignatureMethod.HmacSha1,

Version = “1.0”

};


var client = new
RestClient { Authority = https://api.linkedin.com/uas/oauth&#8221;, Credentials = credentials, Method = WebMethod.Post };


var request = new
RestRequest { Path = “accessToken” };


RestResponse response = client.Request(request);


String[] strResponseAttributes = response.Content.Split(‘&’);


string token = strResponseAttributes[0].Substring(strResponseAttributes[0].LastIndexOf(‘=’) + 1);


string authToken = strResponseAttributes[1].Substring(strResponseAttributes[1].LastIndexOf(‘=’) + 1);

Session[“AccessToken”] = token;

Session[“AccessSecretToken”] = authToken;

 GetUserProfile();

}

  1. GetUserProfile method is used to get the Logged in User First Name and Last name to display on Callback page.

public
void GetUserProfile()

{


var request = new
RestRequest

{

Path = “~”

};


var credentials = new Hammock.Authentication.OAuth.OAuthCredentials

{

Type = Hammock.Authentication.OAuth.OAuthType.AccessToken,

 SignatureMethod = Hammock.Authentication.OAuth.OAuthSignatureMethod.HmacSha1,

 ParameterHandling = Hammock.Authentication.OAuth.OAuthParameterHandling.HttpAuthorizationHeader,

 ConsumerKey = “API Key”,

 ConsumerSecret = “Secret Key”,

Token = Session[“AccessToken”].ToString(),

 TokenSecret = Session[“AccessSecretToken”].ToString(),

Verifier = Session[“Verifier”].ToString()

};


var client = new
RestClient()

{

Authority = http://api.linkedin.com/v1/people&#8221;, Credentials = credentials, Method = WebMethod.Get

};


var MyInfo = client.Request(request);


String content = MyInfo.Content.ToString();


var person = from c in
XElement.Parse(content).Elements()


select c;


String fullName=String.Empty;


foreach (var element in person)

{


if((element.Name == “first-name”) || (element.Name==“last-name”))

 fullName += element.Value.ToString();

}

lblName.Text = fullName;

}

Step 4 Run the Application

  1. Run your ASP.Net web application.
  2. Click on the Login via Linked In button to authenticate through linked in. (This button was manually added in the default.aspx page above).

  3. Application requests the RequestToken based on the API key and Secret key and displays the LinkedIn login form as below

  4. Enter your Linked In Credentials and press “Ok, I’ll Allow It”
  5. It will fetch the Access Token and get the User profile and displayed it in the Callback.aspx page.

Configuring Facebook Authentication in SharePoint 2010

I got a task to configure Facebook Authentication couple of days back. I explored couple of blogs like PointBridge and Osnapz , they are good blog posts it give you an idea how to do that but overall i didn’t find anything like a step by step guide for those users who are doing it first time. Also when i started configuring Facebook Authentication i came across several issues which serves a lot of time and eventually my whole day was spent doing that. Therefore, i thought to make a blog entry which provides Step to Step guide for configuring Facebook Authentication in SharePoint 2010.

Following are the steps to configure Facebook Authentication for SharePoint sites.

Step 1: Download and Install Components

  1. Download and Install Windows Identity Framework SDK from http://www.microsoft.com/download/en/details.aspx?utm_source=feedburner&utm_medium=feed&utm_campaign=Feed%3a+MicrosoftDownloadCenter+(Microsoft+Download+Center)&utm_content=Google+Reader&id=4451
  2. Download Json.Net from
    http://json.codeplex.com/

Step 2: Create a new ASP.Net website

  1. Open Visual Studio and click on File> New Website
  2. Specify Website Name and path to the folder where you want to store the website and click on OK
  3. It will create a new Website.
  4. Now associate a certificate with this Website and enable SSL.
  5. Open IIS Manager by typing inetmgr from the run option in windows OS.
  6. Open Server Certificates and click on Create Self-Signed Certificate.
  7.  


  8. Specify certificate friendly name, click OK.
  9.  


  10. Certificate will be created. Now associate this certificate to your Website
  11. Right click on the Server in IIS and click on Add Website. Specify Site Name and Physical Path, Select Port and click on Ok. Your website will be hosted on IIS.
  12. Select Website and click on Bindings from the left Panel.
  13. Click on Add and select the type ‘Https’ and specify any port by default it uses 443 but you can assign any other port as well. Select certificate you just created and click OK.
  14. Now the server certificate has been associated with your website.
  15. Export this certificate and save it somewhere in your system. We need this when running power shell scripts.
  16. Now Open Visual Studio and change the Sever settings in the Property Pages of the website.
  17. Right click on your website and click on Property Pages
  18. Go to the Startup Options and select Use custom server option and specify the Website URL that is hosted on IIS (Use SSL one).
  19. Now navigate to your website and test it should be in working state and there should not be any issue.
  20.  


Step 3: Create an STS Site from ASP.Net website


  1. Go to the Visual Studio and right click on the Website project and click on Add STS Reference
  2. It will pop up a Wizard window just click Next.
  3. In the next window select “Create a New STS Project in the current Solution”.
  4. Click on Finish.
  5. You will notice a new Website will be added in the solution.
  6. Now Open the IIS Manager and change the physical path to the newly STS website.
  7. Just click on Website in the IIS Manager
  8. Click on Basic Settings from the Right Panel in IIS Manager
  9. Specify new path and click OK.
  10. Now Test your STS website it should run without any issue.

Step 4: Create Application in Facebook

  1. Navigate to http://facebook.com/developers
  2. Sign in with your account
  3. Create new Application using Create New Application option
  4. Provide name
  5. Click ok It will create a new application
  6. Now Click on Edit Setting and Specify your ASP.Net site URL. We need to specify this so it will redirect it to the default.aspx after successful authentication.
  7. Note Application Id and Secret Key that we will reference in the ASP.Net code.
  8. Now we are ready to move next on Step 5.
  9.  

Step 5: Execute Scripts on Power Shell

Open SharePoint 2010 Management Shell and execute following scripts in order.

  1. $cert = New-Object System.Security.Cryptography.X509Certificates.X509Certificate2(“c:\yourexported_cert.cer”)
  2. $map1 = New-SPClaimTypeMapping “http://schemas.xmlsoap.org/ws/2005/05/identity/claims/authentication&#8221; -IncomingClaimTypeDisplayName “FacebookID” –SameAsIncoming
  3. $map2 = New-SPClaimTypeMapping -IncomingClaimType “http://schemas.xmlsoap.org/ws/2005/05/identity/claims/name&#8221; -IncomingClaimTypeDisplayName “Display Name” -LocalClaimType http://schemas.xmlsoap.org/ws/2005/05/identity/claims/givenname
  4. $realm = “urn:researchfacebook.com:facebook” (Specify any urn but note it)
  5. $signinurl = https://localhost:4431/Website_STS/ (Your ASP.Net website address)
  6. New-SPTrustedIdentityTokenIssuer -Name “Facebook” -Description “Facebook custom STS” -Realm $realm -ImportTrustCertificate $cert -ClaimsMappings $map1,$map2 -SignInUrl $signinurl -IdentifierClaim $map1.InputClaimType
  7. New-SPTrustedRootAuthority -Name “Facebook custom STS token signing certificate” -Certificate $cert


Step 6: Modify Code and Edit Configuration file

1. Create a new oAuthFacebook.cs class and add it in the App_Code folder in the Website project.
Following is a code of oAuthFacebook.cs. Change the Yellow highlighted part according to your application.

using System;
using System.Collections.Generic;
using System.Linq;
using System.Web;
using System.Net;
using System.Collections.Specialized;
using System.IO;

///

/// Summary description for oAuthFacebook
///

public class oAuthFacebook
{
public enum Method { GET, POST };
public const string AUTHORIZE = “https://graph.facebook.com/oauth/authorize&#8221;;
public const string ACCESS_TOKEN = “https://graph.facebook.com/oauth/access_token&#8221;;
public const string CALLBACK_URL = “https://localhost:4431/Login.aspx&#8221;;

private string _consumerKey = “”;
private string _consumerSecret = “”;
private string _token = “”;

#region Properties

public string ConsumerKey
{
get
{
if (_consumerKey.Length == 0)
{
//Your application ID
_consumerKey = “000000000000000”;
}
return _consumerKey;
}
set { _consumerKey = value; }
}

public string ConsumerSecret
{
get
{
if (_consumerSecret.Length == 0)
{
//Your application secret key
_consumerSecret = “00000000000000000000000000000000”;
}
return _consumerSecret;
}
set { _consumerSecret = value; }
}

public string Token { get { return _token; } set { _token = value; } }

#endregion

///

/// Get the link to Facebook’s authorization page for this application.
///

/// The url with a valid request token, or a null string.
public string AuthorizationLinkGet()
{
return string.Format(“{0}?client_id={1}&redirect_uri={2}”, AUTHORIZE, this.ConsumerKey, CALLBACK_URL);
}

///

/// Exchange the Facebook “code” for an access token.
///

/// The oauth_token or “code” is supplied by Facebook’s authorization page following the callback.
public void AccessTokenGet(string authToken)
{
this.Token = authToken;
string accessTokenUrl = string.Format(“{0}?client_id={1}&redirect_uri={2}&client_secret={3}&code={4}”,
ACCESS_TOKEN, this.ConsumerKey, CALLBACK_URL, this.ConsumerSecret, authToken);

string response = WebRequest(Method.GET, accessTokenUrl, String.Empty);

if (response.Length > 0)
{
//Store the returned access_token
NameValueCollection qs = HttpUtility.ParseQueryString(response);

if (qs[“access_token”] != null)
{
this.Token = qs[“access_token”];
}
}
}

///

/// Web Request Wrapper
///

/// Http Method
/// Full url to the web resource
/// Data to post in querystring format
/// The web server response.
public string WebRequest(Method method, string url, string postData)
{

HttpWebRequest webRequest = null;
StreamWriter requestWriter = null;
string responseData = “”;

webRequest = System.Net.WebRequest.Create(url) as HttpWebRequest;
webRequest.Method = method.ToString();
webRequest.ServicePoint.Expect100Continue = false;
webRequest.UserAgent = “[You user agent]”;
webRequest.Timeout = 20000;

if (method == Method.POST)
{
webRequest.ContentType = “application/x-www-form-urlencoded”;

//POST the data.
requestWriter = new StreamWriter(webRequest.GetRequestStream());

try
{
requestWriter.Write(postData);
}
catch
{
throw;
}

finally
{
requestWriter.Close();
requestWriter = null;
}
}

responseData = WebResponseGet(webRequest);
webRequest = null;
return responseData;
}

///

/// Process the web response.
///

/// The request object.
/// The response data.
public string WebResponseGet(HttpWebRequest webRequest)
{
StreamReader responseReader = null;
string responseData = “”;

try
{
responseReader = new StreamReader(webRequest.GetResponse().GetResponseStream());
responseData = responseReader.ReadToEnd();
}
catch
{
throw;
}
finally
{
webRequest.GetResponse().GetResponseStream().Close();
responseReader.Close();
responseReader = null;
}

return responseData;
}
}

2. In this step we will replace the existing logic in the Login.aspx for Facebook Authentication
3. Open Login.aspx and replace with following code.

using System;
using System.Web.Security;
using System.Web;
using System.Collections.Generic;
using Newtonsoft.Json;
using Newtonsoft.Json.Linq;
public partial class Login : System.Web.UI.Page
{
protected void Page_Load( object sender, EventArgs e )
{
string url = string.Empty;
oAuthFacebook fbAuth = new oAuthFacebook();

if (Request[“code”] == null)
{
// Response.Redirect(“http://www.google.com&#8221;);
if (Request.QueryString[“ReturnUrl”] != null)
HttpContext.Current.Session.Add(“OriginalQueryString”, Request.QueryString.ToString());

//Redirect the user back to Facebook for authorization.
Response.Redirect(fbAuth.AuthorizationLinkGet());
}
else
{
//Get the access token and secret.

fbAuth.AccessTokenGet(Request[“code”]);

if (fbAuth.Token.Length > 0)
{
url = “https://graph.facebook.com/me?fields=id,name,verified,picture&access_token=&#8221; + fbAuth.Token;
string json = fbAuth.WebRequest(oAuthFacebook.Method.GET, url, String.Empty);

Dictionary claims = GetClaims(json);
HttpContext.Current.Session.Add(“AuthClaims”, claims);

FormsAuthentication.SetAuthCookie(“Facebook Test”, false);
Response.Redirect(“default.aspx?” + HttpContext.Current.Session[“OriginalQueryString”]);
}
}
}

private Dictionary GetClaims(string json)
{
Dictionary claims = new Dictionary();
JObject profile = JObject.Parse(json);

string userID = profile[“id”].ToString().Replace(@””””, “”);
string name = profile[“name”].ToString().Replace(@””””, “”);
string verified = profile[“verified”].ToString().Replace(@””””, “”);
string picture = profile[“picture”].ToString().Replace(@””””, “”);

if (!String.IsNullOrEmpty(userID))
claims.Add(System.IdentityModel.Claims.ClaimTypes.Authentication, userID);
if (!String.IsNullOrEmpty(name))
claims.Add(System.IdentityModel.Claims.ClaimTypes.Name, name);
if (!String.IsNullOrEmpty(picture))
claims.Add(System.IdentityModel.Claims.ClaimTypes.Webpage, picture);

return claims;
}

}

4. In the CertificateUtil.cs I have changed the logic from comparing Subject Name with Friendly Name of the certificate. This is done because I have multiple self- signed certificates installed on my server and all having a same subject name i.e. machine name. So the only unique name I found was Friendly Name, that’s why I have changed it to Friendly Name.
public static X509Certificate2 GetCertificate( StoreName name, StoreLocation location, string subjectName )
{
X509Store store = new X509Store( name, location );
X509Certificate2Collection certificates = null;
store.Open( OpenFlags.ReadOnly );

try
{
X509Certificate2 result = null;

//
// Every time we call store.Certificates property, a new collection will be returned.
//
certificates = store.Certificates;

for ( int i = 0; i < certificates.Count; i++ )
{
X509Certificate2 cert = certificates[i];

if ( cert.FriendlyName.ToLower() == subjectName.ToLower() )
{
if ( result != null )
{
throw new ApplicationException( string.Format( "There are multiple certificates for subject Name {0}", subjectName ) );
}

result = new X509Certificate2( cert );
}
}

if ( result == null )
{
throw new ApplicationException( string.Format( "No certificate was found for subject Name {0}", subjectName ) );
}

return result;
}
finally
{
if ( certificates != null )
{
for ( int i = 0; i < certificates.Count; i++ )
{
X509Certificate2 cert = certificates[i];
cert.Reset();
}
}

store.Close();
}
}
}

5. GetScope Method of CustomTokenSecurityService.cs looks like following

protected override Scope GetScope( IClaimsPrincipal principal, RequestSecurityToken request )
{
// ValidateAppliesTo( request.AppliesTo );

//
// Note: The signing certificate used by default has a Distinguished name of "CN=STSTestCert",
// and is located in the Personal certificate store of the Local Computer. Before going into production,
// ensure that you change this certificate to a valid CA-issued certificate as appropriate.
//
Scope scope = new Scope( request.AppliesTo.Uri.OriginalString, SecurityTokenServiceConfiguration.SigningCredentials );
scope.TokenEncryptionRequired = false;
//Specify the Realm name as defined in the script in PowerShell.
if (scope.AppliesToAddress == "urn:fbauth.com:facebook")
{
//Specify the Web Application URL which has claim based authentication as Facebook as a Trusted provider.
scope.ReplyToAddress = "http://win-6rnn5tdp5c6:47213/_trust/&quot;;

}
else
{
scope.ReplyToAddress = scope.AppliesToAddress;
}
return scope;

}

6. In the Web.config file update the SigningCertificateName


Step 7: Create a New Web Application in SharePoint 2010

  1. Open Central Administration
  2. Click on Manage Web Applications
  3. Select New Web Application option from the Ribbon bar.
  4. In the New Web Application window select Claim Based as Authentication mode.

  5. Select Facebook as Trusted Identity Provider

  6. Click OK
  7. Now Once the Web Application is created we need to create a Site collection.
  8. Click on Create Site Collections under Site Collections
  9. Make sure your newly created Web Application is selected for which you are creating a site collection.
  10. Specify Title and select any template, In the Primary Site Collection Administrator select Browse people/group button.


  1. Select People window opens and there you will see Facebook in the left pane


  2. Now select Facebook and click on the search icon button to search. You will see one Facebook user will populate in the main pane.


  3. Select and click ok
  4. We are done now we will navigate to our Web Application and login with Facebook account.

[Hint]


Step 8: Navigating to SharePoint 2010 Site


  1. Navigate to your SharePoint site. It will show you the option to select Authentication type as Facebook and Windows Authentication.
  2. Just Select Facebook.

  3. As the certificate I have used is self- signed that’s why It will show some warning as below. Just click on Continue to the website and proceed.

  1. It will show the Facebook login page. Enter your user name and password and click on Sign In.


  2. It will show the Main SharePoint site Home page.


Note: One thing you want to do here is when you will login to your account first time with your Facebook Id you will be prompted Access Denied in SharePoint site and it will give show you the numeric ID of your Facebook Account that this does not have an access to your site. Just copy that ID and place it in any of the SharePoint User Groups of your Site Collection or even specify it as a Primary or Secondary Administrator just to test. Then now when you re login, it will show the main SharePoint site page.