In ASP.Net MVC 3 you can easily generate views from predefined scaffolding templates provided for Create, Edit, List, Delete and Details views out of the box which seems quite riveting. Actually, there are some *.tt template files (known as T4 templates) stored at following path C:\Program Files\Microsoft Visual Studio 10.0\Common7\IDE\ItemTemplates\CSharp\Web that contains the basic structure and page layout for these views and based on those templates it generates the Create, Edit, Delete, List, Details and Empty .cshtml or .aspx files depends on which project language you have chosen for ASP.Net MVC project.
In this post I will discuss about T4 templates and how we can customize by taking a simple example.
What is T4
T4 stands for Text Template Transformation Toolkit. T4 generates text based on Text based template files, Template is a combination of text and control logic that you can define using C# or VB.net. Transformation actually executes the code written in template and brings out a final output whereas the Toolkit contains some assemblies leverage to produce the desire output file.
Now, let’s quickly open the sample Create.tt file to see what it looks like and how we can customize. When you open the file you can see directives
<#@ template language=”C#” HostSpecific=”True” #>
<#@ output extension=”.cshtml” #>
language specifies which language we are using either C# or VB.net and HostSpecific =”True” used only with custom hosts. If you set the value of parameter to true, you can access a property called Host in your text template. The property is a reference to the object that hosts the engine. At last, the output extension tells the extension in which the new file this will be generated.
T4 contains 4 types of blocks
-
Expression block
Used as <#= expression #>, we can write C# or VB.net code but don’t use semi-colon at the end of statement
-
Statement block
Used as <# code…. #>, define any C# or VB.net code and initialize variables, define loops etc. Here we have to specify semi-colon at the end of the code statement just like as we program in a class file.
-
Class feature block
Used as <#+ code… #>, define methods, classes, properties and constants and can we called from anywhere within the template file. For example, we can create a function that perform some calculation based on the parameters passed and return a Boolean through which we can handle the UI designing.
Below is the actual page content that dynamically generates the page based on the model attached to it.
@using (Html.BeginForm()) {
@Html.ValidationSummary(true)
<fieldset>
<legend><#= mvcHost.ViewDataType.Name #></legend>
<#
foreach (ModelProperty property in GetModelProperties(mvcHost.ViewDataType)) {
if (!property.IsPrimaryKey && !property.IsReadOnly && property.Scaffold) {
#>
<div class=”editor-label”>
<#
if (property.IsForeignKey) {
#>
@Html.LabelFor(model => model.<#= property.Name #>, “<#= property.AssociationName #>”)
<#
} else {
#>
@Html.LabelFor(model => model.<#= property.Name #>)
<#
}
#>
</div>
<div class=”editor-field”>
<#
if (property.IsForeignKey) {
#>
@Html.DropDownList(“<#= property.Name #>”, String.Empty)
<#
} else {
#>
@Html.EditorFor(model => model.<#= property.Name #>)
<#
}
#>
@Html.ValidationMessageFor(model => model.<#= property.Name #>)
</div>
<#
}
}
#>
<p>
<input type=”submit” value=”Create” />
</p>
</fieldset>
}
<div>
@Html.ActionLink(“Back to List of Main Page”, “Index”)
</div>
In the above mentioned code there is if statement that checks whether the property is a foreign key or not and based on that it generates a drop down code otherwise an input control.
Let’s create a sample application in ASP.Net MVC 3 and check it out by customizing a Create T4 template.
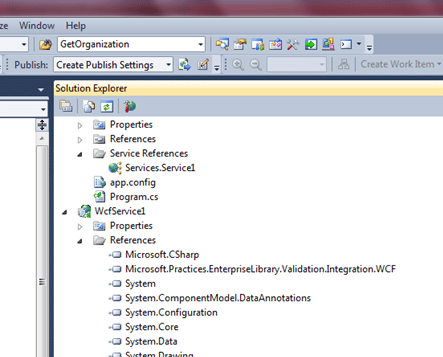
- Create a sample project in ASP.Net MVC3 in Visual Studio.
-
Create a model class for Person and Designation. Person record contains some basic information and Designation holds the list of designations. Below is the Code First model Approach using Entity Framework ver. 4.3.1.
public
class
Person
{
public
long PersonId { set; get; }
public
String FirstName { set; get; }
public
String LastName { set; get; }
public
String EmailAddress { set; get; }
public
String Phone { set; get; }
public
long DesignationId { set; get; }
public
virtual
Designation Designation { set; get; }
}
public
class
Designation
{
public
long DesignationId { set; get; }
public
String DesignationName { set; get; }
public
virtual
ICollection<Person> Persons { get; set; }
}
-
Create a DBContext class and define DBSet for these entities.
public
class
DBContext : System.Data.Entity.DbContext, IDisposable
{
public
DbSet<Person> Persons { get; set; }
public
DbSet<Designation> Designations { set; get; }
}
-
Now create a Person controller selecting Controller with read/write actions and select Person as a Model class and DB Context as you Database Context class.

-
Now if you open the Create.cshtml file you will see a drop down list for designation. As in the template file there was a foreign key check. If you run the application form will be shown as below.

-
Now let’s change a drop down to list box in the Create.tt file.
<div class=”editor-field”>
<#
if (property.IsForeignKey) {
#>
@Html.ListBox(“<#= property.Name #>”)
<#
} else {
#>
Is not a foreign key baba: <#= property.IsForeignKey #> : @Html.EditorFor(model => model.<#= property.Name #>)
<#
}
#>
@Html.ValidationMessageFor(model => model.<#= property.Name #>)
</div>
- Delete the previous controller and generate it again. It will generate a ListBox as specified in a tt file.

This was the simple example showing how developers can modify existing templates based on their needs and reduce development time. Hope this helps!